Monday, July 4, 2016

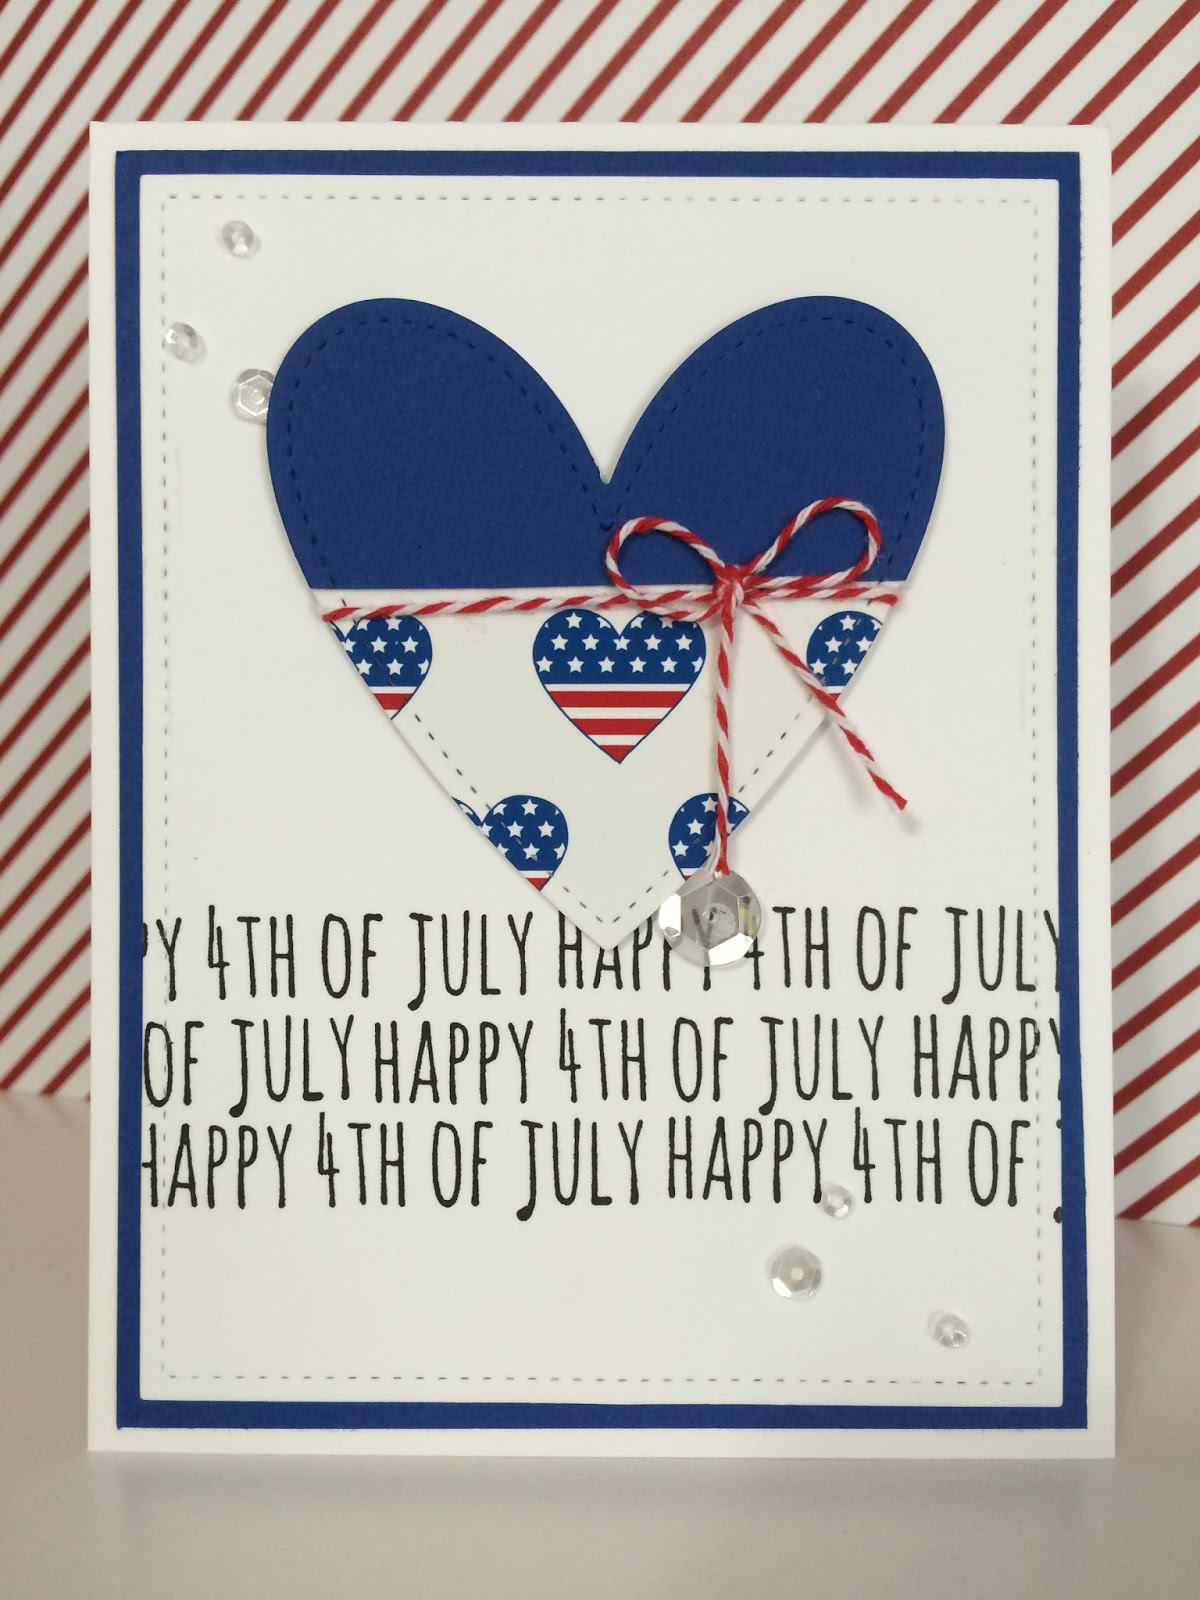
happy fourth of july

Here are the last two cards that I created with the same digital paper kit from last week. I did a version of the same card just changing up the layout a bit. I really liked using the stamp to create my background by just stamping it over and over. Catherine Pooler inspired me to try this technique. I am sure it will be one that I use again.


Thanks for stopping by!

Monday, June 27, 2016

digital play

I have been on a kick lately enjoying the ease of printing digital papers at home to the exact size that I need them for my cards or other embellishments. I have been purchasing most of my papers online from different Etsy stores. This collection is from AMBillustrations and I have used it for cards and making flairs. I don't have any intention to go digital with my crafting, but it is nice to have an alternative every now and then.

Monday, June 20, 2016

my love for sequins

If you followed my blog for a bit, you can definitely see that I have a love for these little shiny things. They just make me so happy. I enjoy mixing colors and sizes and making my own custom sequin blends. I have even started to sell them in my Etsy shop.

Shaker cards are one of my favorite ways to use them, but it can be tricky to mail them when you use thicker cupped sequins. One of my tips is to use the flat ones. You still get the sparkle, but without any of the bulk. On this card, I used digital paper printed at 5x5 and die cut my shape in the middle. I also used very thin fun foam to die cut the same shaped and used it to make my shaker holder. The fun foam is a lot cheaper than the foam tape and works just as well. Since my sequins are only slightly cupped, they still move around when you shake the card. I finished with a few sprinkled onto the front of the panel along with a stamped sentiment and two enamel stars.


Thanks for stopping by!

Monday, June 13, 2016

you are amazing

I have been wanting to give water coloring with distress inks a try and I just fell in love with this new sentiment set from Kaleidoscope Creations Stamps. I think it is a perfect set to go with so many image stamps, but especially works well with flowers.

I heat embossed my floral stamp onto Ranger Watercolor paper using Versamark ink and a fine detail white embossing powder. I then wet my image with a number 2 round brush and dropped in color from my distress pads and allowed the color to dry naturally. I came back and added more color where I felt the flower needed it. Again, letting it air dry and then stamped my sentiment twice to get into all of the texture of the watercolor paper. I finished with some Pretty Pink Posh clear sequins. I love the end results and will definitely be using this technique again.

Monday, June 6, 2016

I didn't forget...

Even though it may seem like it, I didn't forget about my little blog. Life has been so hectic and so many things have been happening in our family that some things had to be prioritized and sadly, the blog fell last on that list. I am going to try to remedy that by working on getting at least one project post a week, probably on Mondays for now, and then work my way up to twice a week. Thankfully, I have continued card making and even started some scrapping during all of this time.

Today's card is a quick card perfect for a forgetful mind (like mine) or a great masculine card. It is using a new stamp set by Kaleidoscope Creations Stamps. I popped up the candle and tied a string around it to mimic tying a string around your finger to help you remember something. I then finished it off by adding a few tiny enamel stars and a sentiment from the same stamp set.


Monday, October 19, 2015

Hello, Cupcake

I created this card to send to my niece in a care package after she spent some time with us this summer. I die cut the "hello" and used tiny type black letters to spell out the "cupcake". I think they are some very old Making Memories letters that I had stocked up on at Michael's. The cupcake and bear are from Mama Elephant and I used a masking technique to get the bear to appear as if he is sitting on top of the icing. I Copic colored him and added some Wink of Stella clear glitter pen to the icing for some shimmer. The border was cut out of glitter paper using a punch that also embossed. The entire panel was foam taped to the front of a white die cut card base.


Thanks for stopping by!

Thursday, October 15, 2015

Hero Arts and Distress Ink

I told you I was making a ton of shaker cards lately. This one is using distress inks to create a blended background to resemble a night sky. I stamped and Copic colored the Hero Arts image and added google eyes for a bit of a whimsical touch. The sequins are a homemade mix of Pretty Pink Posh solid colors. I put foam tape on the back of the purple panel and tied it with a bow. The panel was then adhered to a stitched cut card front.


Thanks for stopping by!

Friday, October 9, 2015

Cedar Lane

I have been in a shaker card making frenzy lately. My latest creation is using the new Pink Paislee Cedar Lane paper collection and the Lawn Fawn leaf dies. I used the dies to make my own confetti with the pattern papers from the Cedar Lane 6x6 paper pad. I inked and curled the edges of the two larger leaves for the outside of the window and placed them on a bed of gold twine. The heat embossed fall sentiment is from http://kaleidoscopecreationsstamps.blogspot.com.

Tuesday, March 31, 2015

You Have My Heart

It is no secret that I adore stamping and I am always looking for a way to stretch my stamps even further. I was trying to figure out a way to stamp out a background without using the whole stamp and avoid getting those harsh lines. I decided to try inking only some of the stamp and then taking a damp baby wipe and blotting off the edges of the stamp removing a bit more ink and softening the look. I stamped this image twice next to each other to create the background going across the page. I love the way it turned out. I was able to treat it just like it was a layer of pattern paper and build my layout right on top of it.


Thursday, March 26, 2015

Lawn Fawn Birthday

This is the time of year that I seem to need a ton of birthday cards. I always say that this year I will be on top of it, but that just never seems to be the case. I needed a quick card to send out during the middle of the week. I have been wanting to use these new Flirty Frames stamp set from Lawn Fawn and that adorable little bird was just calling my name, so off I went to make this cute, colorful card for a special birthday girl.


Thanks for stopping by!
Dani

Monday, December 29, 2014

Just A Few More

Stopping by to share just a few more cards that I made to send to my niece for the Christmas season.


I hope you enjoy!

Wednesday, December 17, 2014

A New Look


I have been toying around with the idea of a blog update for some time now. I am not much of a computer techy person so this was not as easy as it may have seemed for me. I wanted something to reflect the person I am. I like simple, clean lines and just a touch of whimsy. I searched Etsy for pre-designed blogs and I decided on a shop call The Blog Shop. Citra was such a wonderful person to work with and she gave me exactly the type of look I was going for. I may still have a few tweeks here and there, but nothing major. I am hoping that this new look will help me want to blog more in 2015.

Ok, onto more fun stuff. Today I want to share a birthday card that I made for my sister. (Happy Birthday, Nikki!) I used deli paper and stamped it with Memento black ink. Once dried, I sprayed it with three colors of Distress Sprays and blended the colors with water. I stamped the image using black ink and colored it in using Copic markers. I added some clear Wink of Stella to the cupcake icing for a bit of sparkle. I then used the coordinating dies to cut my images out and added foam tape to the pieces for dimension.


Friday, December 12, 2014

Shine Bright

I know its been a little since I posted last, but blogging more is on my to do list for 2015. so in the meantime, I will share a few projects before the holidays that I didn't get around to posting.


Thanks for stopping by
Dani

Monday, September 1, 2014

Life Right Now

After almost a two week break from creating, I finally sat down this weekend and worked on a couple of projects. Today's layout is using the main scrapbook kit and card kit from last month's Studio Calico release. It is called Sandlot and I mixed the two kits together to create one large kit. I usually don't keep kits and add-ons separate if they are in the same collection. I also used a few of the printables from the same month and a couple of the stamps.


Thanks for stopping by!
Dani

Monday, August 11, 2014

To Be Continued

Today's layout is using the July card kit, Penny Arcade, from Studio Calico. I usually only buy kits from clubs in the months that I like them. This month, I decided to use the 6x6 papers to make a couple of layouts to show you that you don't need to buy a kit made specifically for the type of projects that you want to do.


I have used project life cards to create a mixed media layout and I have never even done a project life page. So don't feel limited by the supplies that you have. Use what you have on hand and make it work for you.

Thanks for stopping by!
Dani

Tuesday, August 5, 2014

Hello Lovely

This week, for Camp Scrap, I created a layout using design lesson five. I used a border strip and placed all of my elements on top, like a shelf. I used the Brighton Pier collection from Studio Calico and pulled together this layout in under an hour. The longest part was waiting for the painted wood veneer to dry.


Thanks for looking!
Dani

Wednesday, July 30, 2014

Mixed Media With Camp Scrap

Playing along with May Flaum, in Camp Scrap, but instead of doing mixed media on a canvas, I decided to do it on a layout. I used the Dear Lizzy Daydreamer collection along with playing with some gesso and neocolors. I love these watercolor crayons for use on top of gesso. The color glides around really smoothly until it dries. One tip though is to let each color dry thoroughly before you add the next so that your colors don't blend. Unless that is the look you are going for. I cut hearts out of one of the pattern papers and layered them with vellum and paper hearts that I punched out. A touch of mist and a sprinkle of enamel dots and I called it done.


Thanks for looking!
Dani

Monday, July 28, 2014

Featured Layout

I loved making this layout about my girl turning twenty. I am thrilled to have it featured today on the Studio Calico blog. 


Come by and check it out along with a challenge of my own.

Thanks for looking!
Dani

Monday, July 7, 2014

Camp Scrap 2014

I am taking May Flaum's Camp Scrap class again this summer and I started off last week working through the first Kit-tastic lesson. I put together a small kit using a 6x6 paper pad, a few letter stickers, a couple of rolls of washi tape, and one sheet of puffy stickers for embellishments. I grabbed a few random things to add as I worked on each project such as mists, a doily, a few tags, other than that, it was a rather small kit. I wish I would of photographed the kit before I started using it. Here are the projects that I created using just those supplies.


Thursday, February 21, 2013

Birthday Preps

I am still working here, just not on scrapbooking or card making ideas. My little niece turns one in three weeks and I am determined to give her the best cowgirl birthday party a little girl could wish for. This week, I am working on the banners for the backdrop of her cake table. I printed the font in brown and I altered the size of the letters from 1 1/2 to 2 inches. I circled cut them and pop dotted on to scalloped circles. I used my Silhouette to cut the banners, inked all of the edges brown, and assembled the flags. Next up is to string on to some jute and hang. (I just wanted to say that the letters are not glued down yet, that is why some are crooked and off the flags a bit.)


I must admit that I am having so much fun planning her party. I haven't had to do this in years.

Thanks for visiting!
Dani