Monday, October 31, 2011

Happy Halloween

Welcome Gals and Ghouls!! Just a little wish for your Halloween day.


Happy Halloween!!!
I hope your day is filled with lots of treats and not any tricks.
I'll be back tomorrow with a goodie that will surely satisfy your craving for creativity!
Until then...

Tuesday, October 25, 2011

Halloween 2

This, was the second card that I was working on, that helped to create the mess that was on my desk. If you remember seeing it with a different sentiment, you are correct. There was something about it that I didn't quite like, so I had to remove it and try again. This version I like much better.

The card base was made exactly like yesterday's card, except I changed the zig-zag border to a scalloped one. The sentiment was also the same, but for some reason, that wasn't working for me. I decided to change it to something that was a little slimmer and longer. I cut the ends to resemble ribbon ends. I also changed the placement of the sentiment from the lower right corner to the center of the card. This is only the second rosette that I have ever made and I think I am addicted. (The first was on the December card a few days ago.) They are just so easy to do and it only takes a piece of paper. Gotta love that!

The final thing was to add a simple shoestring bow that I dyed, again using the Distress Inks. One tip is that if you want a solid dyed ribbon, lay it down and run your dabber across the surface. If you hold the ribbon in your hand to do the crinkle type of ribbon, it gets splotchy. Dye it straight first, then crinkle it to dry. And it only takes about 15 minutes to dry.


Well, I hope you have enjoyed my latest Halloween card. I think I am done now and will be shifting my gears to a few fall things, but mostly Christmas. I never seem to give myself enough time to get all of my projects done. I usually have to carry over a couple from each year. Maybe, if I am a really good girl, Santa will bring me a stocking full of my finished projects. A girl can wish, can't she?

Monday, October 24, 2011

Just Keeping It Real

I just wanted to let you know that I appreciated all of the comments on my room being so neat and clean. But, just to keep it real, this is what it really looks like when I am working on something. I usually don't have a vacant spot on my desk and I start to turn and put things on the computer desk beside me. So, don't be fooled by the cleanliness that you saw the day I finished moving the room. This is really what my creative chaos looks like. I am sure yours never looks like this. lol...Just trying to keep it real.


This is the Halloween card that I was working on that created that big mess. I printed the text pattern paper from a free online download from here. I cut it down to 5x7 which is the size of my card front. The chevron and black dot paper is from the Teresa Collins Haunted Hallows collection. I cut them into 1 inch strips and punched the dot one with a Martha Stewart craft punch. I then sewed the two together using a zig-zag stitch on my machine.

 
The 31 October is a sticker from the same TC pack. The witch face is a punch out from the kit that I inked the edges and pop dotted for added dimension. The bat is Tim Holtz grungeboard shape that I inked black and added black glitter while still wet. Once it was dried, I glued it to the center of a seam binding bow that I dyed black using Distress Stains. (I love this stuff!!!) And lastly, the Happy Halloween was stamped using the Studio Calico Label stamps and punched with the matching EK Success Label punch. I then stamped Happy Halloween from an old Purple Onion Designs seasonal stamp.
So, this is what I accomplished this weekend. One card and a huge mess to clean. hehe!! Ok, and a trip to Michael's and the start of another card. What did you get done?

Wednesday, October 19, 2011

Day 2 - Unveiled

Once the purging was done, this is the room that I am left with. It is about 1/3 smaller than my other room, but I think it will work out just fine. All that I have left to do is hang a few things and paint the closet doors.
This first photo is of my desk. It is 48 long x 36 deep and I absolutely love it!  I can have all my tools at arms reach, but still have plenty of room to work.

This next picture is of my paper and embellishment stand. It is right behind my desk and to the left. I can easily turn and rifle through the drawers or grab an ink pad off the top carousel without having to leave my chair. The crate on top houses my paper collections and projects in progress.

This L-shaped desk holds my computer and Silhouette machine in one corner and my cutter on the left. I have plenty of extra room here if I need to lay something down to dry or just get it out of my way. Usually when I scrap, every available surface gets covered.


This cubby unit was purchased from my local home improvement store. I bought two and stacked them together. The canvas boxes hold various supplies and the other shelves hold a few other things such as, inks and stamps.

A pretty clean desk.

And lastly, a shot of the card that took me away for an hour or so from my original task of moving rooms. It was quickly pulled together with a holiday kit that I am offering in my new Etsy shop. Check it out if you have time and tell me what you honestly think. Any feedback is appreciated.

I hope you enjoy my little room tour and that you have some special little place to call your own. :)

Tuesday, October 18, 2011

Day 1

Okay, here is a quick look of what I accomplished yesterday. I managed to get the furniture moved in, a few things hung on the wall (with the help of dh), and the closet stuff moved in.


My desk is a foldable office table that my hubby built a top for. I love it because when I am in a sewing mood, I can fit a yard of fabric on it for cutting. This table was cleaned when I first put it in this room, but somehow during the day, I became side tracked and started working on a card.

Crime Scene!!

And a sneak of my card.

 
So, there it is. I guess it was a pretty productive day. Today is the hardest part. I need to purge the stuff that is on the floor and desk so that I can fit it in the smaller closet. Wish me luck!

Monday, October 17, 2011

Sorry, We Interrupt Your Creativity for

I have a dedicated craft room in the back of my home, but I hate being back there, all by myself. So today and tomorrow, I am working on moving my craft room to the front of the house. I have a smaller office up there, and it will be a tighter fit, but I am willing to sacrifice space for companionship. I will be right next to the living room, so I can still have contact with my family. And a quick run to the kitchen for a coke or coffee. Hehe!

Stay tuned for some finished pictures and details on my new Etsy shop!

Thursday, October 13, 2011

Sneak Peek

 Just a small sneak as to what I have been working on. More details to come soon!
 

Tuesday, October 11, 2011

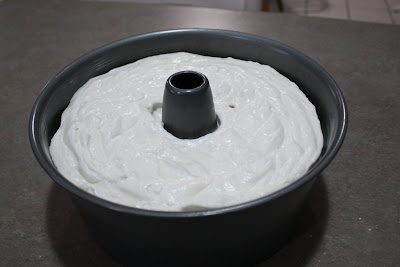
Fall Baking

I love that I can take something as simple as egg whites

beat it with a little sugar, and add a tiny bit of flour,


and get something as amazing as this!


If you have never tried homemade Angel Food cake, you don't know what you are missing. Trust me. It is nothing like the store bought or the box mix. It really is super easy to make and it doesn't take much time at all. The mixer does most of the work. The recipe I use is here. The only thing different that I do is use a whole scrapped vanilla bean AND 2 tsps. of vanilla and I omit the almond extract. If you like Angel Food cake, I really think you should try this recipe at least once.

Friday, October 7, 2011

Halloween Cards

I wanted to create a couple of simple cards to send to my Godchildren, over the course of October. Not wanting to put too much time into each one, because I will be sending them x 3 each week, I decided to use my Silhouette to die cut shapes in multiples that I re-sized to fit the fronts of my cards.

The papers are from My Mind's Eye Blackbird collection. I had this leftover from last season and thought it was perfect for the age group I needed to cover. (10-16) On the first one, I die cut the house, sign, and bats. I trimmed the house and sign to suit my needs. The moon was just a 3 inch cut circle. I punched the fence with a Martha Stewart border punch. I inked all of the pieces with Black Soot distress ink. I like that I was able to smooth the ink out for a smokey look. I backed the house windows with yellow card stock and pop dotted it to the card for added dimension.The sign was stamped with CTMH Tiny Type acrylic stamps.


The card below was very quick to create. I added a ribbon border and topped it with a strip of the same fence punch from above. The sentiment tag was stamped using the Studio Calico Labels stamp, then punch with the matching EK Success Label punch, then the sentiment (from Purple Onion) was stamped on to the center of the label. Again, I pop dotted it for added dimension, and so that it would lie flat over the ribbon and border. I added some orange rhinestones to the ribbon for a little bling.

 
The inside of the top card was left blank and the bottom one says "from my house to yours", to go with the house themed paper. I love how both of these cards came out. Now, I have just two more weeks to go. Any ideas?

Wednesday, October 5, 2011

Fall Cards

This weekend, I managed to find sometime amid the beautiful fall weather we were having, to create these two fall cards. Inspired by the vivid autumn colors, I stamped, colored, and cut out the little leaves to put on each card. I pop dotted them for added dimension. The top background was created with a Cuttlebug texture plate.


The paper I used was some old Imaginisce from last season. The ribbon is seam binding that I dyed using Fired Brick Distress Stain. (I love this stuff!)


I hope your weekend was great and that you found some time to create something beautiful!


Monday, October 3, 2011

Cuteness Alert!!!!

Yes, I am one of those crazy people who dress up their fur babies for Halloween. And why not, when they are this cute?!

Doesn't his little face just make you melt? Mine too, which is why he gets his way so much.


And yes, she is sleeping during our photo shoot. How adorable is that? She is a perfect princess.


So, come on and share yours. I know I am not the only one who takes cute pictures of my "babies" dressed up in costume. Link yours up in the comments section of my blog to share.

Happy Fall to All!!!